13 Simple Tips to Grow Your Blog With Video
13 Simple Tips to Grow Your Blog With Video
When it comes to growth, adding video to your blog is one of the most effective ways to grow your audience. A larger audience means more eyeballs on your ideas, products, courses, ads, or whatever it is you’re using to earn revenue. The addition of media holds so many benefits that it would be almost criminal for you to not include video within your content strategy.
Adding video to a blog is not a new idea by any means, but you’d be surprised at how many blogs aren’t tapping into this resource. By adding video to my blog posts, I’ve seen a 300% increase in my email subscribers, the traffic to my blog has almost tripled, revenue is up, and I’m able to repurpose content and present value to my audience in new and unique ways.
These milestones would never have been accomplished if it weren’t for the addition of video to my blog. However, just because I embed a video within a blog post doesn’t necessarily mean that I’ll have hundreds of new subscribers the next day. In order to see substantial growth, there are certain steps I always take when adding media to my content. Let’s take a closer look at the thirteen simple tips to grow your blog with video.
1. SHOOT A VIDEO
I know what you’re thinking. Duh! However, a lot of people never make it past this first tip. It’s one of those things that’s easier said than done, but don’t let that discourage you. It’s much easier and less expensive to put together a great video than it was just a few years ago.
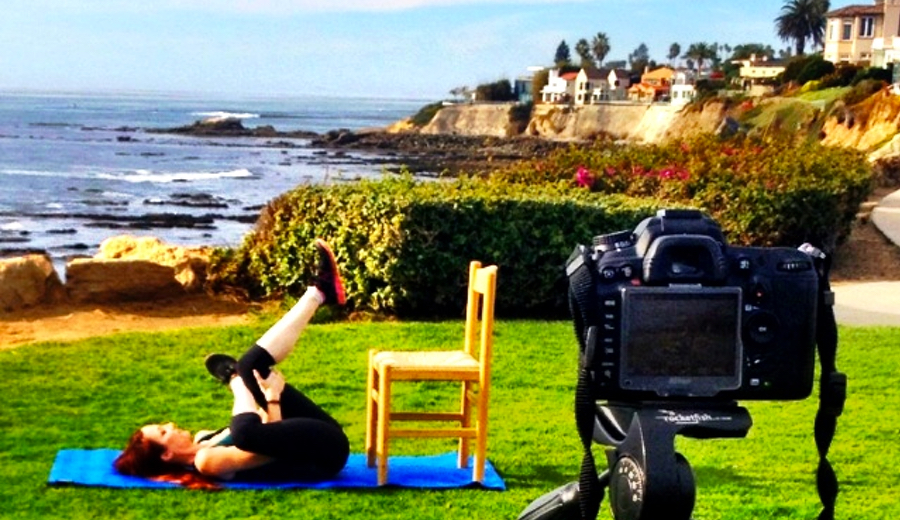
Yoga video shoot in La Jolla, CA with my wife/beautiful model. 😉
The first thing you’ll need in order to shoot a video is a camera (thank you captain obvious). But seriously, a decent camera can go a long way whenever it comes to shooting a quality video.
My first recommendation, if you have the funds, is to invest in a DSLR camera. I personally use a Nikon D7000 DSLR camera (affiliate link) to create all of my videos, and I love it. A decent camera can cost anywhere from $500 to $1600, but the end result will be an extremely high quality, professional looking video that won’t need very much work in postproduction. It’s definitely worth the investment.
If you’re on a budget, then a smartphone is the next best thing. In fact, the camera technology within the majority of smartphones is capable of producing some great video. Check out what my friends over at Wistia were able to produce by using an iPhone to shoot their video. Pretty impressive stuff.
2. HAVE A SCRIPT
Nothing is worse than watching a video where the person being filmed is fumbling through their presentation or making mistakes left and right. This is a surefire way to turn people off and discredit yourself as an authority within your niche.
That’s why it’s extremely important to have a script to map out what you’re going to say before you begin shooting. This doesn’t necessarily mean that you have to memorize every single phrase you’re going to say word for word, but it’s always a good idea to plan ahead and write down what you’re going to say in your video.
Having a script will make you look and sound more professional, people will listen to what you have to say, and the overall quality of your video will improve. Plus people will be more inclined to share your video is if looks and sounds great. That’s why I always recommend that before you start shooting, sit down and write a script of what you’re going to say.
3. FOCUS ON PRODUCTION
Contrary to popular belief, you don’t need a ginormous budget to create a high-quality video. Sure, it helps, but you can still put together a pretty impressive video if you focus on certain aspects of production.
We’ve already touched on a few of the most important parts of production, but if you want to shoot a great video, you need to focus on these six things; camera, lighting, sound, set, script, and editing. I know that this may sound like a lot, but trust me, if you invest even a little bit of time and effort in the production of your video, you’ll have a professionally polished piece of media that will pay dividends down the road.
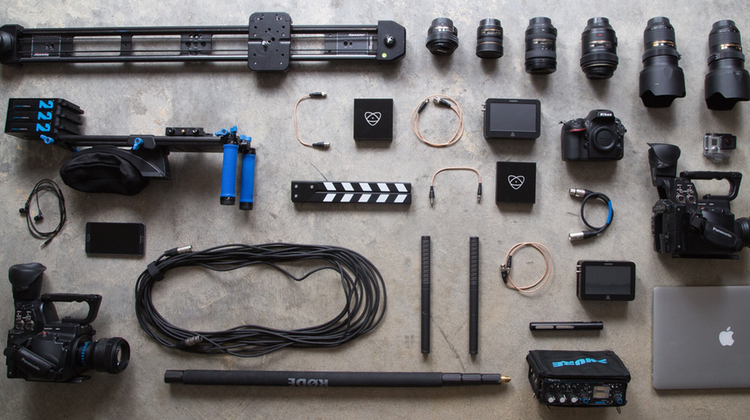
Here’s a quick list of the equipment that I use to produce every single one of my videos (some of these links are affiliate links, just FYI).
- Camera: Nikon D7000 DSLR
- Lighting: LimoStudio Photo Video Studio
- Sound: Sennheiser G3 Wireless Lavalier Mic
- Set: Included in the LimoStudio lighting gear
- Script: Plain doc on Pages or Microsoft Word
- Editing: Final Cut Pro X
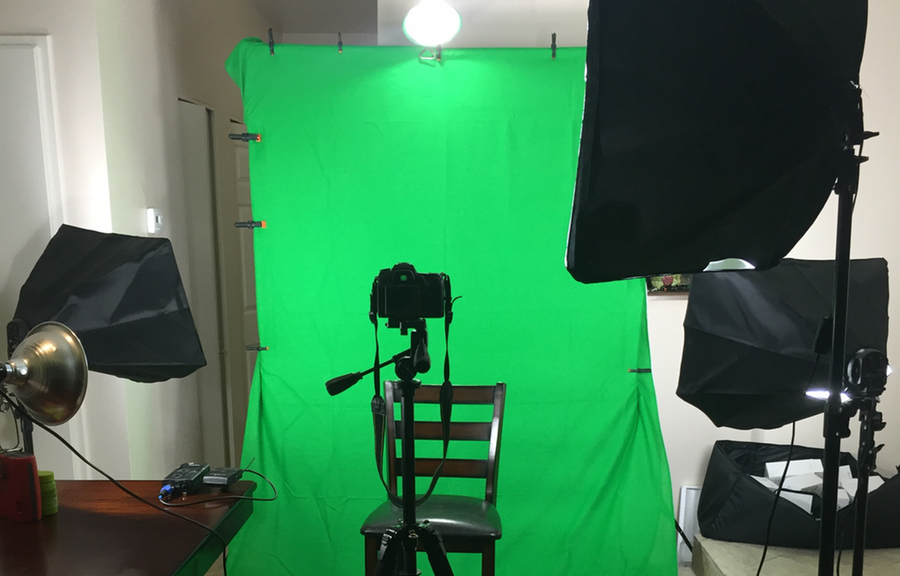
My very first home studio. I was able to produce some great videos with this setup.
I can’t stress this part enough. Focusing on production is what’s going to set you apart from the guy who records videos from his computer while sitting in a dimly lit dorm room. Your audience will notice the difference in quality and they’ll be more inclined to like, follow, subscribe, comment, and share your content.
4. PRESENT VALUE
Every single piece of content that you create should focus on one thing: presenting value to the reader. I don’t care what you blog about, you could be blogging about finding Bigfoot for all I care. If you’re giving your audience some sort of value then you’re going to be successful.
Video is one of the most effective mediums whenever it comes to presenting value because it’s so dynamic. Instead of writing a blog post that’s exclusively comprised of text, you can add video and present value in a much more interactive format.
Unfortunately, I can’t tell you the exact steps of how to present value to your audience because every audience is different. However, I can tell you that the majority of content consumers prefer video over plain text. Data shows that people are more inclined to watch a video than read an entire blog post.
Before you begin shooting a video, think about your audience. Ask yourself, what drives them? What keeps them up at night? What are their problems? What are their dreams? What are their desires? The more you understand your audience, the better your value proposition will be. Once you have an effective value proposition, incorporate it into your videos.
5. PITCH YOUR LEAD MAGNET
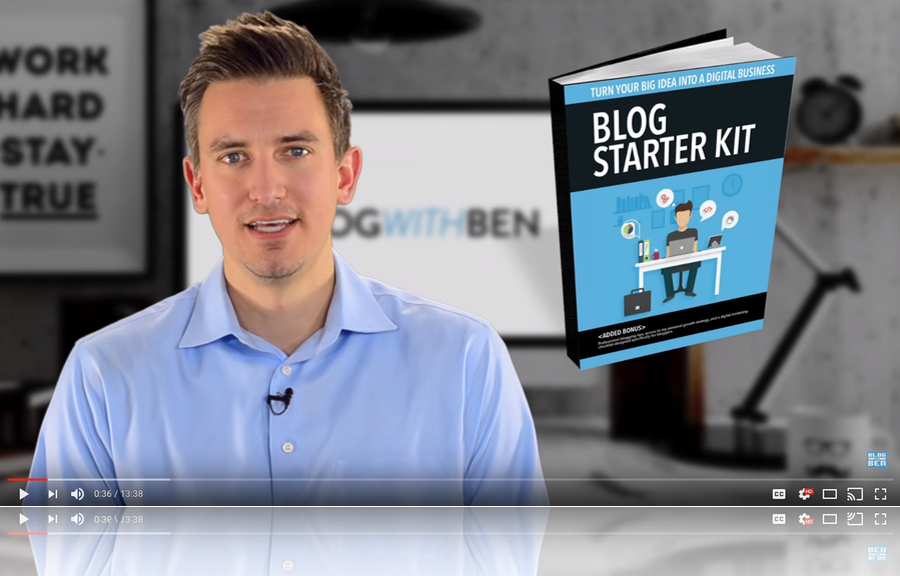
Every video you create should mention your lead magnet at some point in time. For example, in my “How to Start a Blog” tutorial, I do a quick pitch of my free eBook, “The Blog Starter Kit” in the opening of the video. I also include links to my opt-in form, which we’ll cover in the next step, but this method has proven quite successful when it comes to growing my email list.
Now it’s up to you where you include your pitch. I’ve seen some people open with their free offer, I’ve seen some people close with it, and then I’ve seen some people sprinkle it throughout their presentation. However you decide to do it, I always recommend including your lead magnet within your videos.
One final thought on this topic is to make sure that your lead magnet matches the content of your video. What I mean by this is that you’ll want to try and keep your free offer in-line with the content of your video. For example, I wouldn’t pitch my step-by-step guide on how to start a blog before a video about podcasting.
Even though these topics could fall within the same industry, I would try and keep the free offer as closely related to the video’s content as possible. So, instead of an eBook about blogging, I would pitch a free guide on how to monetize a podcast. People will be more inclined to follow through with your free offer if it’s related to the content they're viewing.
6. INCLUDE LINKS TO YOUR OPT-IN FORM
When using YouTube as your media source, you'll have the ability to include links within your video. This is a great source of traffic because if you can generate a lot of views, then you’re potentially setting yourself up for some additional high-quality traffic.
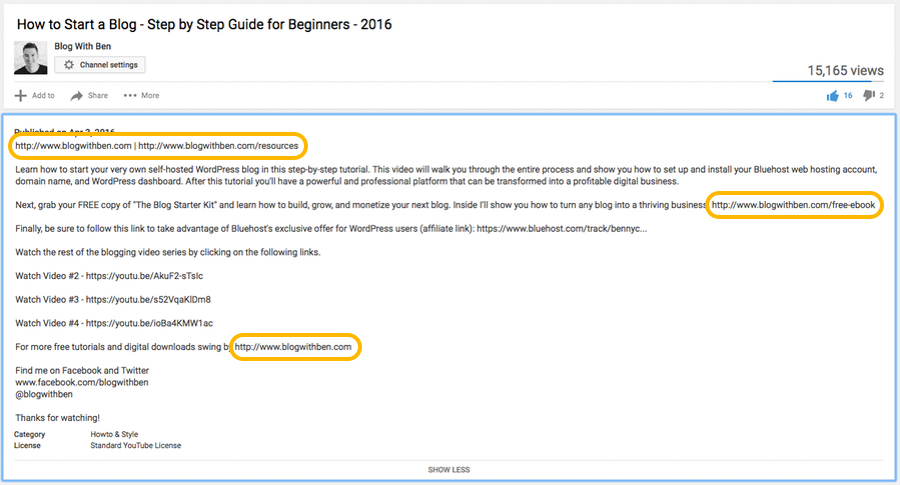
One linking strategy is to include links to your opt-in form within the basic info section of your YouTube video. Take a look at the image above. As you can see, I’ve included two links to my blog and my opt-in form within the basic info section. Doing so has given my blog a lot more exposure and it’s helped me increase conversions.
Another linking strategy is to link directly to your website through an annotation within your YouTube video. If you’re unfamiliar with what an annotation is, they’re clickable areas on the screen of your YouTube video that will direct traffic to a specific website.
But before you can add annotations to your video, you have to make sure the site you’re linking to (your blog) is an associated website. This strategy can be a bit complicated for new bloggers because there are a few semi-technical hoops you have to jump through in order for your site to be approved as an “associated website”. However, this is the only way that YouTube will allow you to link directly to your blog through an annotation.
One thing to keep in mind, YouTube has a pretty strict policy whenever it comes to linking to external sites. If you’re going to do so, make sure it’s within their guidelines and that your blog has been approved as an associated website. Visit YouTube Help for more info on annotations.
7. CLOSE WITH AN EFFECTIVE CTA
Your call to action, or CTA, will be what persuades your audience to follow through. The CTA can come in many forms, but it ultimately moves your viewers through the sales and marketing funnel.
I realize that this tip states that you should close with an effective CTA, but honestly you can litter your CTA’s throughout your entire video. In fact, I recommend that you at least open and close with some sort of CTA.
Your call to action doesn’t need to be over the top or flashy in order to get people’s attention. But it does need to create a sense of urgency and it needs to be specific. You don’t want the CTA to blend in with your content either. It needs to stand out and be noticeable.
Some quick CTA tips: 1. Create a sense of urgency, 2. Use images, 3. Be specific, 4. Link to a landing page, 5. Make it easy for the viewer to take action, 5. Use action verbs and phrases, 6. Know your audience.
I use Splasheo’s free video boosters at the end of all my videos. They’ve helped me increase subscriptions, comments, and conversions. Plus, I used Splasheo for my Blog With Ben video intro. All I did was provide the graphic and they did the rest. I highly recommend their video services.
8. USE A TRUSTED VIDEO PLATFORM
I’ll keep this tip simple…use YouTube. Sure there are other platforms out there that offer more analytics and business features, but if you’re just starting out, YouTube is a powerful platform that includes some impressive growth tools.
If you’re looking for something a little more customizable, then Vimeo may be more your speed. On top of their free basic plan, Vimeo offers premium paid plans as well. These premium platforms come with ad-free options, a human support team, free video lesson, and much more.
Another great premium media source is Wistia. They offer some great video hosting plans along with an intricate video analytics platform. They’re definitely more suited for a business, but it doesn’t hurt to check them out. Their blog has a ton of helpful tips whenever on how to produce videos as well.
9. EMBED YOUR VIDEO WITHIN BLOG POSTS, EMAIL CAMPAIGNS, AND EBOOKS
Embedding video within your content is a highly effective technique that, whenever used correctly, can yield some great results. If you’re unfamiliar with what embedding means, it’s simply adding a snippet of code within the HTML of your blog. Once added, the video can be included across a wide range of content.
The video below walks you through the entire process of not only embedding a video, but making sure that the video is responsive as well. It’s one thing to embed a video, but you’ll want to make sure that all of your media is responsive, and this video will show you some tricks on how to create a responsive embedded video.
The [23:59] mark is where I show you how to embed a responsive video.
I encourage you to embed your videos within multiple types of content. Doing so will help you gain exposure and spread your brand.
10. SHARE YOUR VIDEO ON SOCIAL MEDIA
After you’ve shot, edited, and finalized your video, it’s time to share it across your social media channels. This is one of the quickest and easiest ways to get your video out there and in front of multiple audiences.
Click on each icon to check out my social media pages. Come say hi!
As soon as I post a video on YouTube, I go straight to Twitter, Facebook, Instagram, and Google+, and I use those social networks to share my video. I’ll typically add a few words about the video accompanied with a picture or screenshot of the video (depends on which social network I’m using). But I always distribute my videos on my social media channels.
I should also mention that all of the video platforms out there have some pretty powerful and efficient sharing features. Simply use the in-house social sharing features or copy and paste the video’s URL to your wall. Either way, the power of video combined with social media is an extremely powerful growth strategy.
11. ASK PEOPLE TO SHARE YOUR VIDEO
Word of mouth is one of the most effective yet underutilized growth strategies out there. Think of it this way, whose opinion do you typically trust more? An acquaintance’s opinion or a stranger’s opinion? Nine times out of ten, you’re going to trust what your friends recommend.
That’s the power of word of mouth, and that’s why it never hurts to ask your friends, family, and even coworkers to share your videos. Especially if the video is relevant to their needs, wants, or industry. The people close to you are going to be your biggest brand ambassadors in the beginning. Don’t be afraid to reach out and ask people to share your video. You’ll be surprised at how many organic visitors you’ll gain through this strategy.
12. USE PAID ADVERTISING
Out of all of the growth tips, this one is optional. Mainly due to the fact that paid advertising can get expensive. But if you budget for it, you can make it work. Seriously, you can yield some impressive results by spending $10 if you know what you’re doing. Now, some niches are more expensive to advertise in than others, but there are ways to effectively advertise without breaking the bank.
If you use YouTube to host your video, then you’ll have the ability to easily promote your video through AdWords. This feature is very effective and it can get your video in front of a much larger audience. The amount of money you spend will determine how many times your video ad is shown, but you can market your video for as little as $5.
For example, if your campaign budget is $30, then your video will be allowed 1.4K – 2.8K estimated views and 3,206 ad impressions. It will be shown in-stream and in-display and will be promoted to a much larger audience.
Another option is to use paid advertising across your social media channels. Facebook, Twitter, and Instagram all have advertising platforms that allow you to promote specific posts and videos for a price. Again, you’ll need to budget for this, but adding paid media to your growth strategy is an effective and compelling way to grow your blog.
13. KEEP MAKING VIDEOS
Finally, just keep creating unique content. If you stay consistent and continue to produce videos, you’ll start to see your blog grow. It won’t happen overnight, but adding video to your blog is a highly effective growth strategy that can open the traffic floodgates.
Additionally, videos are probably one of the most engaging types of content. They humanize your blog and allow you to interact with your audience in some pretty cool and innovative ways. You don’t need a huge budget to make a quality video either. Just follow these tips and you’ll start to see that you too can effectively grow your blog with video.

Written by Ben Cummings
Founder of blogwithben.com
Ben is a Digital Marketing and CMS Specialist for Bridgepoint Education who holds an MBA with a specialization in Entrepreneurship. He enjoys teaching, blogging, startups, a hoppy IPA, and college basketball. Whenever he's not blogging, you can find him cruising around sunny San Diego with his amazing family.

